
AWS EKS – Part 28 – Deploy Pods in Different VPC Subnets
VPC CNI supports a feature to deploy Pods in subnets that are different from the cluster and worker nodes subnets. This feature allows you to extend the available IP addresses for Pods and overcome IP address limitations when your current subnets are running out of IP addresses. In this lesson, you learn how to create and configure different subnets and configure the VPC CNI to use when deploying Pods instead of the default ones.
Follow our social media:
https://linkedin.com/in/ssbostan
https://linkedin.com/company/kubedemy
Register for the FREE EKS Tutorial:
If you want to access the course materials, register from the following link:
Register for the FREE AWS EKS Black Belt Course
Considerations and Limitations:
- When using a different subnet than the one assigned to the worker node’s primary interface, no IP addresses can be assigned to the Pods from that interface. This means the maximum number of Pods that can be deployed into the worker node will be decreased. To overcome this limitation, use IP Prefixes.
- All subnets must be on the same VPC, and subnets from different VPCs can not be used. Moreover, this feature doesn’t work with IPv6 clusters.
- Pods deployed using
hostNetwork: truewill use the subnet assigned to the primary network interface and not the custom subnet.
AWS EKS – Part 26 – Increase AWS VPC CNI Allocatable IP Addresses
EKS Custom Subnet setup procedure:
- Create and configure new subnets.
- Create and configure Security Groups for subnets.
- Configure VPC CNI to use custom subnets.
- Create ENIConfig resources for new subnets.
- Migrate old nodes to new ones and use custom subnets.
Step 1 – Create EKS Custom Subnets:
For a worker node in a specific Availability Zone(AZ), you must create one or more subnets in that zone as needed. You can have as many subnets as you want in each availability zone, but each worker node can only use one subnet.
aws ec2 create-subnet \
  --vpc-id vpc-09a71d02067cf835d \
  --cidr-block 10.0.101.0/24 \
  --availability-zone eu-west-2a \
  --tag-specifications "ResourceType=subnet,Tags=[{Key=owner,Value=kubedemy}]"

aws ec2 create-subnet \
  --vpc-id vpc-09a71d02067cf835d \
  --cidr-block 10.0.102.0/24 \
  --availability-zone eu-west-2b \
  --tag-specifications "ResourceType=subnet,Tags=[{Key=owner,Value=kubedemy}]"

aws ec2 create-subnet \
  --vpc-id vpc-09a71d02067cf835d \
  --cidr-block 10.0.103.0/24 \
  --availability-zone eu-west-2c \
  --tag-specifications "ResourceType=subnet,Tags=[{Key=owner,Value=kubedemy}]"
To learn more about creating private subnets, internet gateway, nat gateway, etc., read the following article, which explains all of them as EKS requirements:
AWS EKS – Part 1 – Deploy EKS cluster requirements
Step 2 – Config Security Groups for EKS:
Each custom subnet must have at least one security group, and you can specify as many as you want. You can also use the same security group assigned to the cluster and worker nodes. If a different security group is used, you must allow communication between the cluster security group and the custom subnet security group.
I will use the cluster’s SG to make this lesson easier and more understandable.
To find the cluster security group:
aws eks describe-cluster --name kubedemy --query "cluster.resourcesVpcConfig.clusterSecurityGroupId" --output textIt’s important to know how external traffic is managed in EKS when custom subnets are being used. When AWS_VPC_K8S_CNI_EXTERNALSNAT=false is used (this is the default option in VPC CNI), then all external traffic that wants to leave VPC will use the worker node’s primary interface IP address and its security group. If you enable the External SNAT feature, the custom subnet and its security group will be used, but you must create a proper route using NAT Gateway. If you’re using the Security Groups for Pods feature, the security group assigned to the Pod will be used in both scenarios.
AWS EKS – Part 27 – Security Groups for Pod Network Security
Step 3 – Config VPC CNI to use custom subnets:
To enable VPC CNI custom configuration capability, set the following environment variable to the current instance of VPC CNI deployed in the cluster:
kubectl set env daemonset aws-node -n kube-system AWS_VPC_K8S_CNI_CUSTOM_NETWORK_CFG=trueStep 4 – Create ENIConfig for custom subnets:
The ENIConfig resource is responsible for providing subnets and security groups to be used by the VPC CNI for Pods. If the resource name is the same as the availability zone name, you must use the zone label which is available at the node to help the VPC CNI detect the proper ENIConfig resource for that node. This configuration allows you to have only one custom subnet per availability zone. If you want to have more than one custom subnet per availability zone, you must mention the name of the ENIConfig resource in the worker node’s annotations. This option allows you to assign different subnets to different worker nodes in the same availability zone.
cat <<EOF | kubectl apply -f -
apiVersion: crd.k8s.amazonaws.com/v1alpha1
kind: ENIConfig
metadata:
  name: eu-west-2a
spec:
  subnet: subnet-0280f4d5301b9b9a6 # 192.168.101.0/24
  securityGroups:
    - sg-0434119d2c8b49857 # Cluster Security Group.
EOF

cat <<EOF | kubectl apply -f -
apiVersion: crd.k8s.amazonaws.com/v1alpha1
kind: ENIConfig
metadata:
  name: eu-west-2b
spec:
  subnet: subnet-01c5c75adac99bd7f # 192.168.102.0/24
  securityGroups:
    - sg-0434119d2c8b49857 # Cluster Security Group.
EOF

cat <<EOF | kubectl apply -f -
apiVersion: crd.k8s.amazonaws.com/v1alpha1
kind: ENIConfig
metadata:
  name: eu-west-2c
spec:
  subnet: subnet-0f81ace2c467a3433 # 192.168.103.0/24
  securityGroups:
    - sg-0434119d2c8b49857 # Cluster Security Group.
EOF
Note: Cluster SG will be used by default if no security group is provided.
If the ENIConfig names are the as the AZ names, use this command:
kubectl set env daemonset aws-node -n kube-system ENI_CONFIG_LABEL_DEF=topology.kubernetes.io/zoneIf using different names, use this command to annotate the node:
kubectl annotate node NODE_NAME k8s.amazonaws.com/eniConfig=ENI_CONFIG_NAMEReplace the ENIConfig resource name with the one you want.
Step 5 – Migrate EKS Worker nodes:
After configuring the VPC CNI and ENIConfigs, to make custom subnets work, you must deploy new nodes and remove the old ones. This process needs to scale the current node groups or create new ones, cordon and drain the old nodes, and finally remove the old node groups or worker nodes. To make It easier, I suggest creating new node groups instead of dealing with node group scaling and removing old node groups.
To create a new node group, run this command:
aws eks create-nodegroup \
  --cluster-name kubedemy \
  --nodegroup-name application-managed-workers-002 \
  --scaling-config minSize=1,maxSize=1,desiredSize=1 \
  --subnets subnet-0ff015478090c2174 subnet-01b107cea804fdff1 subnet-09b7d720aca170608 \
  --node-role arn:aws:iam::231144931069:role/Kubedemy_EKS_Managed_Nodegroup_Role \
  --remote-access ec2SshKey=kubedemy \
  --instance-types t3.medium \
  --ami-type AL2_x86_64 \
  --capacity-type ON_DEMAND \
  --update-config maxUnavailable=1 \
  --labels node.kubernetes.io/scope=application \
  --tags owner=kubedemy
To learn more about how to deploy worker nodes, read the following articles:
AWS EKS – Part 3 – Deploy worker nodes using managed node groups
AWS EKS – Part 4 – Deploy worker nodes using custom launch templates
AWS EKS – Part 5 – Deploy self-managed worker nodes
AWS EKS – Part 6 – Deploy Bottlerocket worker nodes and update operator
AWS EKS – Part 7 – Deploy ARM-based Kubernetes Worker nodes
AWS EKS – Part 8 – Deploy Worker nodes using Spot Instances
AWS EKS – Part 9 – Deploy Worker nodes using Fargate Instances
AWS EKS – Part 10 – Deploy cluster with private API endpoint
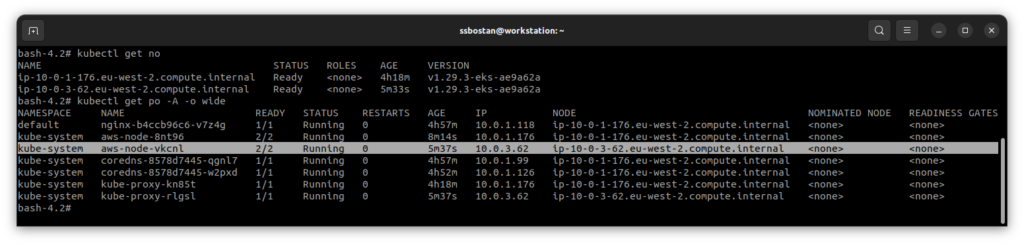
The new node is up and running, but the IP address of the Pods on it, “the VPC CNI and kube-proxy Pods”, is not an IP from our custom subnets. It’s because they are using hostNetwork: true and as mentioned, they use the primary interface.
The next step is to cordon and drain the old nodes:
kubectl cordon NODE_NAME

kubectl drain --delete-emptydir-data --grace-period=60 --ignore-daemonsets NODE_NAME
cordon makes the node unschedulable and no new Pod can be deployed there.
drain evicts current Pods on the node and schedules them elsewhere.
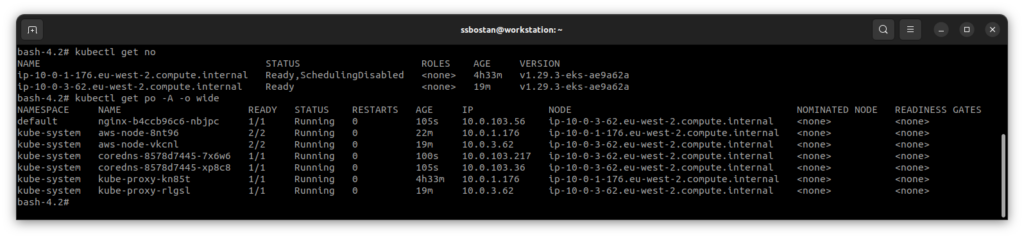
Now, you can safely remove the old node group:
aws eks delete-nodegroup \
  --cluster-name kubedemy \
  --nodegroup-name application-managed-workers-001
Conclusion:
AWS VPC CNI supports different features to allow you to implement various use cases in your environments. So far, we have introduced its most useful features in this course, and you can learn more about it from its official GitHub repository.
If you like this series of articles, please share them and write your thoughts as comments here. Your feedback encourages me to complete this massively planned program. Just share them and provide feedback. I’ll make you an AWS EKS black belt.
Follow my LinkedIn https://linkedin.com/in/ssbostan
Follow Kubedemy’s LinkedIn https://linkedin.com/company/kubedemy
Follow Kubedemy’s Telegram https://telegram.me/kubedemy
Related Posts
AWS EKS – Part 4 – Deploy Worker Nodes using Custom Launch Templates
AWS EKS – Part 35 – Kubernetes Storage using EFS CSI Driver